Yoga Philosophy
Ahimsa: The paradox of the western yogic world
Today, we’re going to start the incredible journey towards Yamas and Niyamas. This will help integrate the principles of Yoga into not only our practice
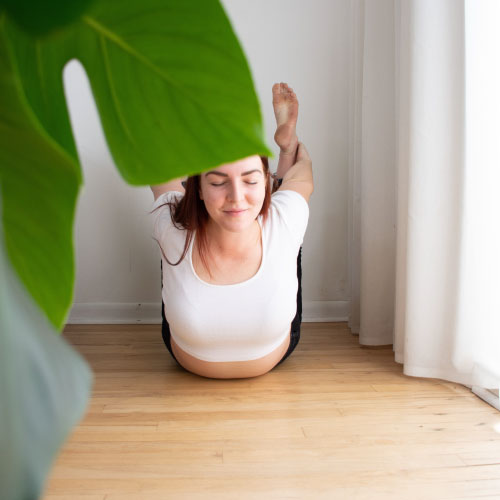
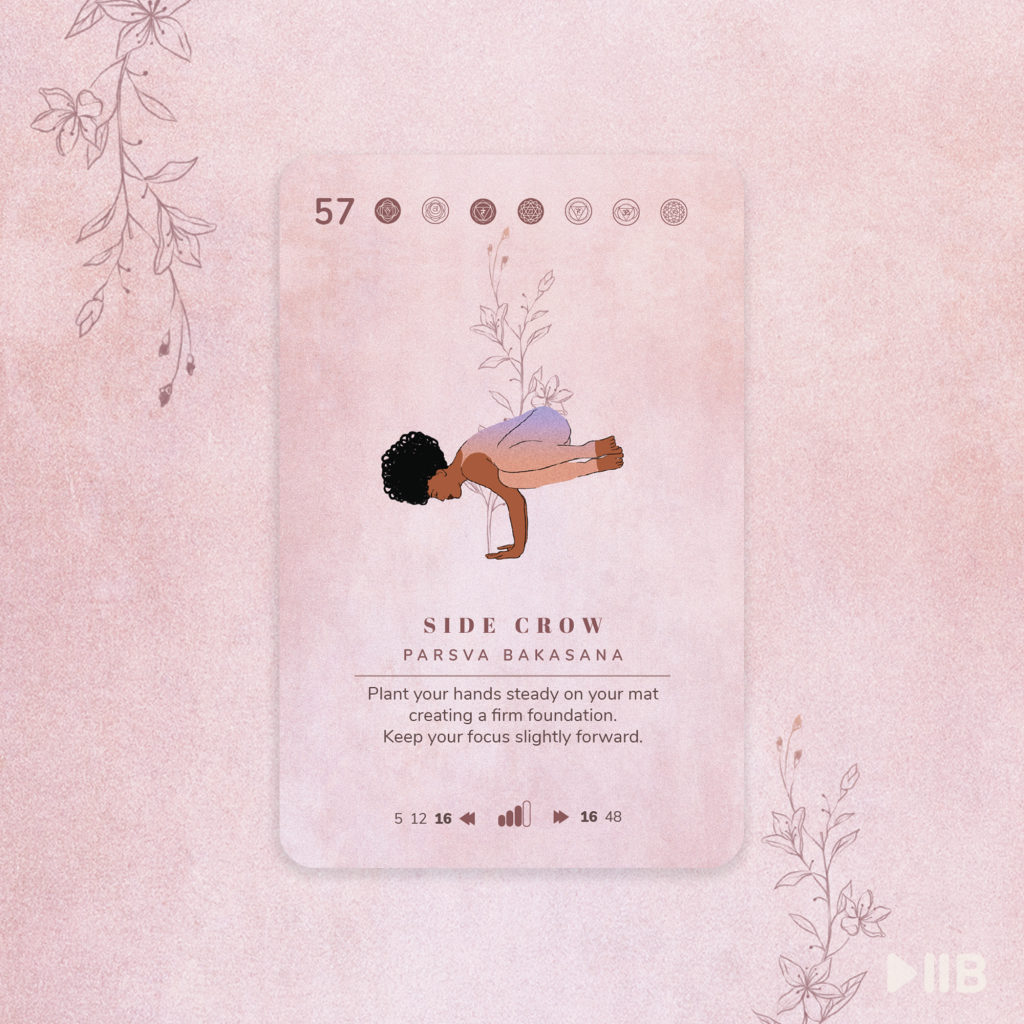
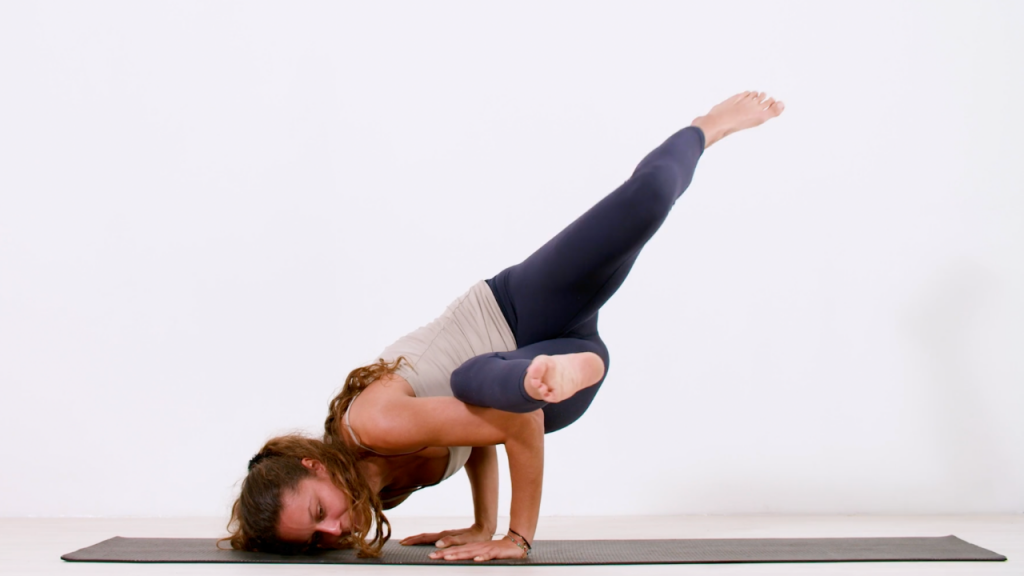
If you’ve recently nailed the Yoga Crow Pose, you’re likely looking for your next challenge. Side Crow is the natural next step in your arm balance journey; it is super fun to practice, massively improves your upper body strength, and tests your balance to the extreme. What’s more, it increases focus, boosts self-confidence, and cultivates unwavering determination.
Don’t worry if you’re still perfecting your Yoga Crow Pose, as many yogis find Parsva Bakasana (Side Crow Pose) easier than Bakasana (Crow Pose). Thus, you don’t have to be a pro to play around with this fun balancing asana.
When learning an advanced arm balance like Side Crow Pose, understand what body parts are used in the posture. Your wrists, arms, shoulders, and core muscles must be warm to enter and hold this pose. Moreover, as it involves a deep twist and forward fold, the obliques and back muscles should also be warm. Plus, take some time to stretch your spine and outer hips.
Some preparatory poses to include in your warm-up sequence are:
1. To practice Side Crow, start from Twisted Chair Pose (Parivrtta Utkatasana) to the right side. Take a few breaths here, focusing on the twisting motion; gently press your bottom elbow into the knee to twist deeper.
2. While holding the twist, sink your hips low while bending your knees deeply. You may need to lift your heels off the ground to drop your sitting bones to your heels.
3. Place your palms on the ground (to the side you are twisting towards), shoulder distance apart. Spread the fingers and press the weight evenly between both hands.
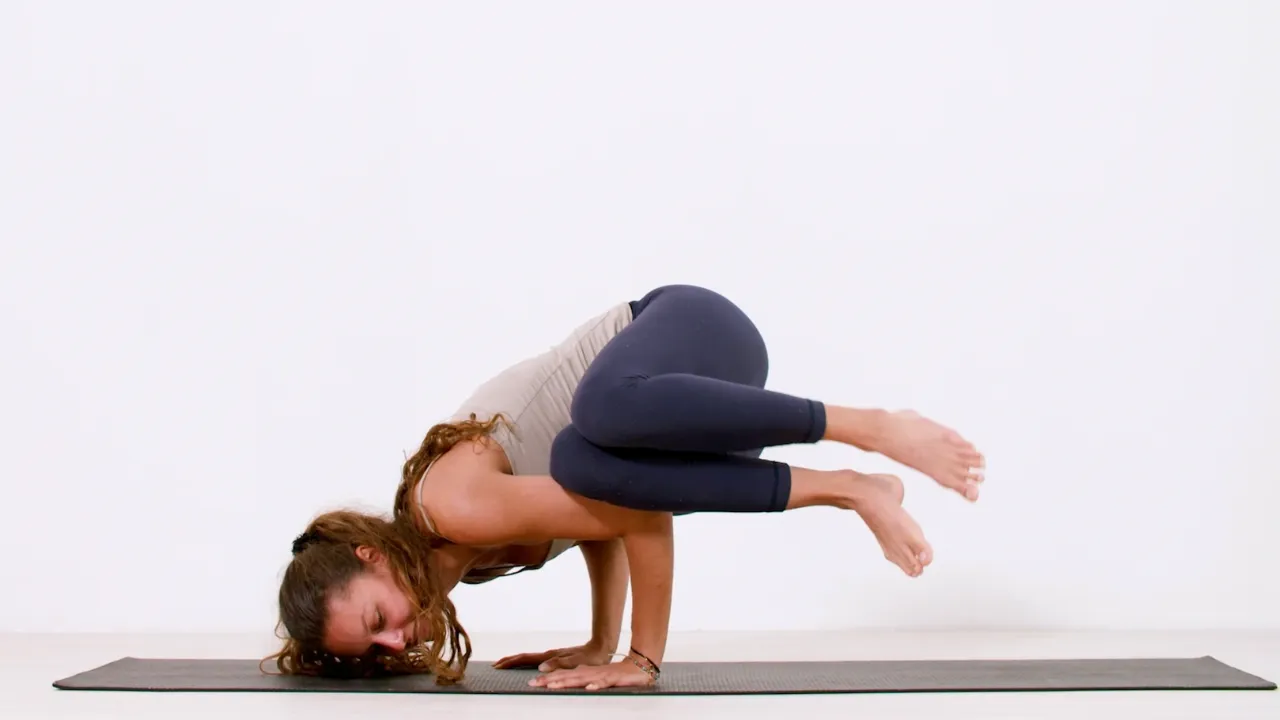
4. Bend your elbows, stacking them over your wrists and drawing them towards your ribs like in Chaturanga. Simultaneously, shift your hips forwards towards your hands, keeping both knees together. Rest the outside of your right hip against the back of your right upper arm. Your right knee should rest on your left upper arm, creating a flat beam with your thigh across the backs of both arms.
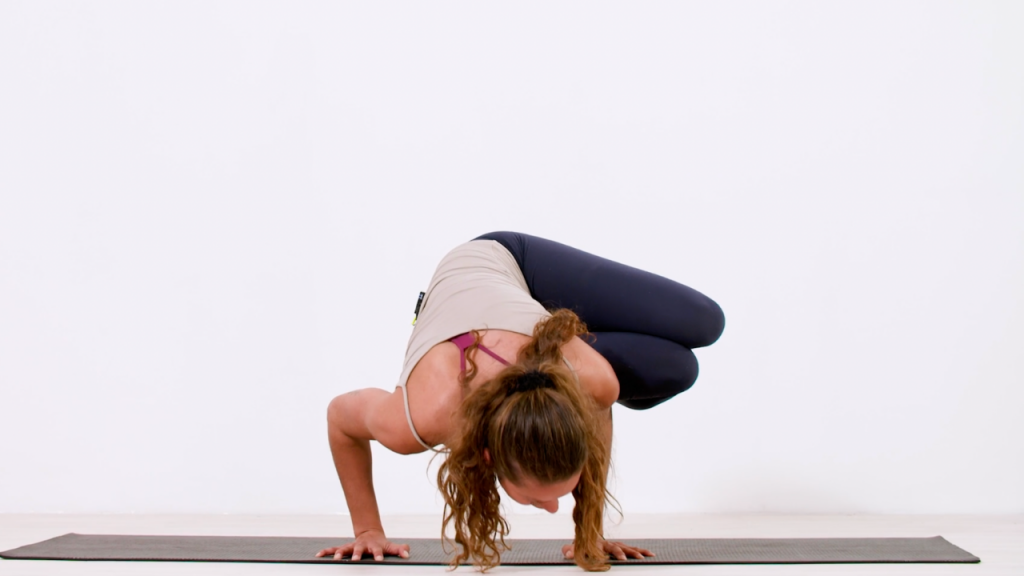
5. Lean further forwards as you press your right hip down. Slowly lift both feet off the floor with a 90-degree elbow bend and your upper arms parallel to the floor. Try lifting one foot, then the other, or both simultaneously, and see which way feels more accessible for you.
6. Once you’ve taken flight, keep adjusting your weight distribution, trying to bring your feet and legs parallel to the floor.
7. Keep your core firmly engaged and continue pressing strongly through the hands to maintain balance and stability. Then try to straighten your arms as much as possible without losing balance or slipping out of the posture.
8. Keep your chest lifted and gaze forwards, not down.
9. Hold for up to 10 breaths, as many as you can manage. To release, lean back and gently bring your feet to the ground, then lift your hips back to the twisted chair.
10. Neutralize the spine and relax the body in Uttanasana before repeating Side Crow on the other side.
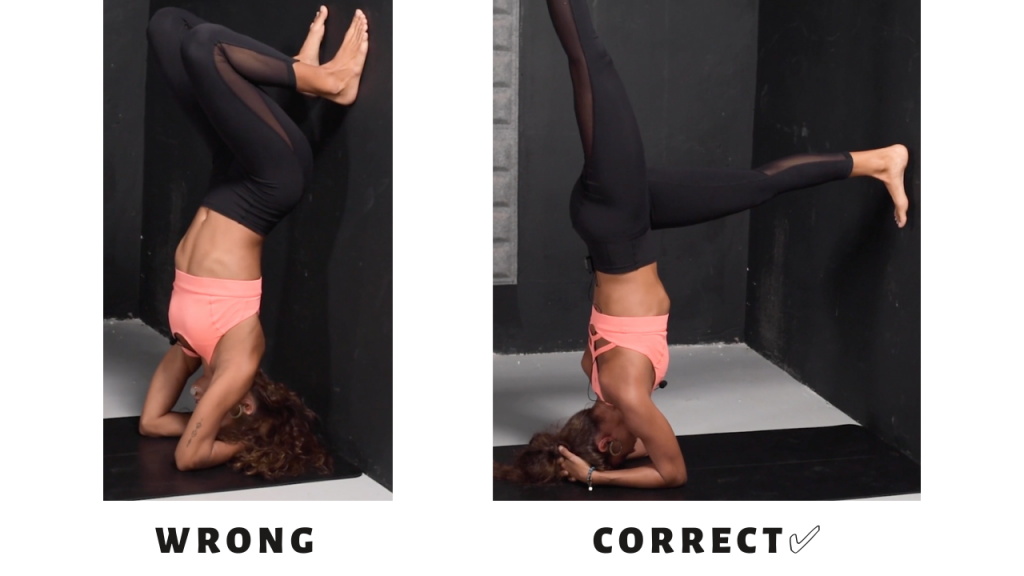
To modify Side Crow, lift just one foot off the ground at a time rather than taking flight. If you are scared of falling out of the pose, place a blanket or pillow in front of you.
Another modification is to set a block in front of you at medium or highest height. Then, as you lean forwards, rest your forehead on the block for more stability and balance as you lift your feet.
For an extra challenge, extend the legs fully, keeping the knees together and feet in line with the hips.
Like with Crow Pose, you can also practice jumping back to Chaturanga from Side Crow rather than releasing back to Twisted Chair.
Once you’ve figured out Crow and Side Crow, don’t stop there. Eight-Angle Pose is another powerful arm balance from the PlayPauseBe deck, and we have a super helpful step-by-step tutorial showing how to do it!

Want more tips for mastering arm balances? The PlayPauseBe Yoga Course has an entire module on these challenging postures! Enjoy comprehensive lessons with visual breakdowns and explanations of Crow Pose, Side Crow, Eight-Angle Pose, Firefly, and more. In addition, you’ll learn exactly how to warm up and cool down each part of the body used in arm balances.
Today, we’re going to start the incredible journey towards Yamas and Niyamas. This will help integrate the principles of Yoga into not only our practice
So you’ve heard all about the incredible benefits of yoga and are ready to give it a go? Awesome! However, before you attend your first
You don’t have to go to many yoga classes or watch many online tutorials to know that breathing is a vital part of yoga practice.